To print this issue, either press CTRL/CMD + P or right click on the page and choose Print from the pop-up menu.
Click on images to enlarge.

Crop Conditions
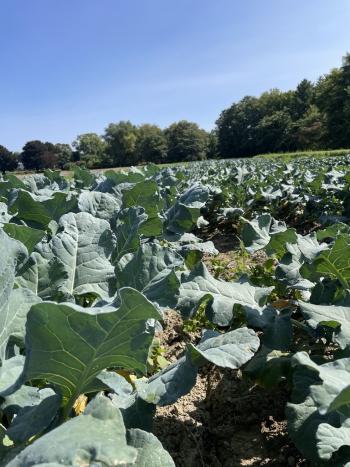 Crops are rolling in as summer harvests continue while the transition to fall bulk crops has begun—tomatoes, peppers, squash, and zucchini, along with winter squash, potatoes and sweet potatoes. We have a few more weeks of sweet corn harvests, and crews are busy sorting and packing onions and garlic between field tasks. It’s dry out there—we aren’t officially in drought status, but it hasn’t rained in weeks and folks are irrigating to get the last blocks of corn to ripen evenly and for fall greens to germinate and grow.
Dahlia growers: Next Tuesday we’ll be out at Grant Family Farm in West Newbury to learn about their dahlia production, as well as common pests of this important cut flower crop. Come learn from peer growers and have dinner on us! Click here for more information and to register.
Alliums
 Allium leafminer (ALM): The fall flight of ALM has begun. Oviposition marks were observed on perennial chives and scallions this week in Hampshire Co. Growers should plan to protect fall leek crops with insecticides now. Adult flies will lay eggs in the foliage of allium crops for 5-7 weeks, approximately through the end of October, leaving distinctive lines of oviposition marks, about the size of a 12-point period on a printed page. The resulting larvae will tunnel down to the base of the plants, causing damage that can become infected by soft rot bacteria, and will pupate in the bulbs or exit and pupate in the soil. Adults will be emerging this fall from fields or gardens that had infested crops this spring, although the flies are quite mobile and will move to other fields. If your leeks or fall scallions are currently uncovered, they are at risk of infestation. Plan to apply a pesticide, or you can scout your crop very thoroughly and apply row cover now if you don't find any oviposition marks. Covering a crop now brings some risk of trapping the adult flies under the cover. Effective conventional insecticides include: dinotefuran (e.g. Scorpion, IRAC Group 4A), cyantraniliprole (e.g. Exirel, Group 28), spinetoram (e.g. Radiant, Group 5), and lambda-cyhalothrin (e.g. Warrior II, Group 3A). Watch out for maximum application rates for lambda-cyhalothrin if you’ve been spraying for thrips in leeks all season. The most effective OMRI-listed insecticide program is 2 consecutive sprays of spinosad (e.g. Entrust, Group 5) at the 6 oz/acre rate, mixed with a 1-5% v/v solution of insecticidal soap (e.g. M-Pede), applied 2-4 weeks from now, plus an application of pyrethrins + azadirachtin. (The premix Azera is no longer on the market but PyGanic and one of the many azadirachtin products like Azaguard, Azatrol, or Azatin O can be tank-mixed). An adjuvant should be used for the pyrethrins + azadirachtin application that doesn’t increase the spray tank pH above 6.5, which means NOT using M-Pede as the adjuvant in that mix.
Chenopods
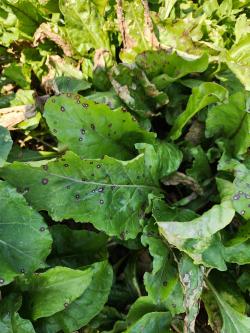 Cercospora leaf spot is common on beets and Swiss chard at this point in the season. This fungal disease causes round, tan leaf spots that are surrounded by a red halo (the red halo does not develop on yellow varieties). Spots will eventually coalesce into large, blighted areas, making foliage appear burned and potentially defoliating plants and reducing yields. Fungicides can effectively control Cercospora but must be early (as soon as or before symptoms develop) and often. The most effective conventional materials are Tilt (propiconazole, FRAC Group 3) and Miravis Prime (pydiflumetofen + fludioxonil, Groups 7 + 12). The development of disease resistance is a concern and FRAC groups should be rotated. Effective OMRI-listed materials, according to Cornell Cooperative Extension trials, include LifeGard (a Bacillus product) and Cueva (copper octanoate, Group M01) + Double Nickel LC (a Bacillus product). Spores will overwinter on infected crop residue; till under infected crop debris promptly and thoroughly after harvest.
Umbelliferous Crops
 Carrot seed moth caterpillars are active now in flowers of umbelliferous crops (e.g. carrots, dill, cilantro). These are small (1/4” long) caterpillars that feed on flowers. They sometimes produce webbing that surrounds a small group of flowers. This pest is only an issue for those growing umbelliferous crops for seed. On a small-scale, they can be hand-squished or picked into a cup of soapy water. Bt products should be effective against carrot seed moth as well.
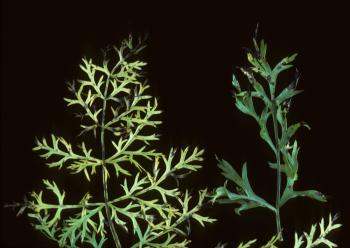
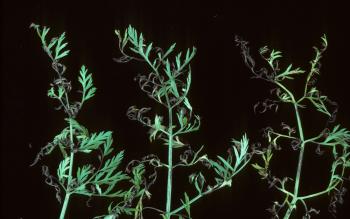 Foliar diseases like Alternaria leaf spot and bacterial leaf blight are developing in carrot crops now. These diseases start out as small leaf spots in the foliage but under humid conditions can cause severe blighting and defoliation. Both diseases are spread by splashing water and equipment and workers moving through fields, and spores of Alternaria are also spready by wind. Avoid working in fields when foliage is wet, and work in uninfected fields before moving to infected fields. Fungicides can control Alternaria leaf spot if applied early and often; copper will be the best control option for bacterial leaf blight, for both conventional and organic growers. See the carrot and parsnip disease control section of the New England Vegetable Management Guide for labeled materials.
Sweet corn
We’re nearing the end of sweet corn season, and we will be reporting sweet corn trap counts for 1 more week, for those sites that are still trapping. European corn borer and fall armyworm are not an issue for the rest of the season as the ECB flight is done and there is no more whorl-stage corn for FAW to lay eggs in. Corn earworm continues to be caught, especially in southeastern MA where winds continuously blow moths up from the south. CEW numbers are relatively low in the rest of the state.
| Table 1. GDDs & Sweet corn pest trap captures for week ending September 18 | |||||||
|---|---|---|---|---|---|---|---|
| Nearest Weather station |
GDD (Base 50°F) |
Trap Location | ECB NY | ECB IA | FAW | CEW | CEW SPRay interval* |
| Western MA | |||||||
| South Deerfield | 2778 | Whately | 0 | 0 | - | 6.5 | 5 days |
| Eastern MA | |||||||
| Bolton | 1633 | Bolton | 0 | 0 | - | 3 | 6 days |
| Sharon | 2548 | North Easton | 0 | 0 | 0 | 4 | 5 days |
| Providence, RI | 2690 | Seekonk | 0 | 0 | 1 | 20 | 4 days |
| Swansea | 0 | 0 | 3 | 32 | 4 days | ||
|
ND - no GDD data for this location - no numbers reported for this trap n/a - this site does not trap for this pest * If 2+ days above 80°F occur, shorten spray interval by 1 day. |
|||||||
| Table 2. corn earworm spray intervals | ||
|---|---|---|
| Moths/Night | Moths/Week | Spray Interval |
| 0 - 0.2 | 0 - 1.4 | no spray |
| 0.2 - 0.5 | 1.4 - 3.5 | 6 days |
| 0.5 - 1 | 3.5 - 7 | 5 days |
| 1 - 13 | 7 - 91 | 4 days |
| Over 13 | Over 91 | 3 days |
Contact Us
Contact the UMass Extension Vegetable Program with your farm-related questions, any time of the year. We always do our best to respond to all inquiries.
Vegetable Program: 413-577-3976, umassveg@umass.edu
Staff Directory: https://ag.umass.edu/vegetable/faculty-staff
Home Gardeners: Please contact the UMass GreenInfo Help Line with home gardening and homesteading questions, at greeninfo@umext.umass.edu.
Fall Soil Testing
Although soil samples can be taken any time of year, many growers prefer to take samples in the fall. This allows time to apply lime if soil pH needs to be adjusted, plant a cover crop to recover any leftover nutrients, make a nutrient management plan, and order materials well in advance of spring planting. Furthermore, the UMass Soil Testing Lab and most similar labs tend to have higher demand in the spring and turn-around times are faster in the fall and winter.
Soil Sampling Tips
It is best to take soil samples at the same time of year for the most consistent and reliable results. Avoid sampling when the soil is very wet or soon after a lime or fertilizer application. If a field is uniform, a single composite sample is sufficient. A composite sample consists of 10 to 20 sub-samples taken from around the field that are then mixed together. To obtain sub-samples, you can use a spade to take thin slices of soil representing the top 6 to 8” of soil. A soil probe is faster and more convenient to use than a spade and is worth the small investment if you have many fields to sample. Remove any thatch or other organic material such as manure from the surface before taking your sample, as this will result in inaccurate soil organic matter levels. Put the slices or cores into a clean container and thoroughly mix. Take about one cup of the mixture, spread it out on paper to dry overnight at room temperature, and put it in a zip lock bag. Samples do not need to be fully dry to submit, but drying them overnight will speed up the process at the lab. Label each sample on the outside of the bag, and fill out the sample submission form thoroughly—see links below. The instructions below are correct for the UMass Lab; make sure you follow specific sampling, packaging, and labeling instructions for the lab you use.
Many fields are not uniform, for many reasons, including uneven topography, wet and dry areas, different soil types, and areas with varying previous crop and fertilizing practices. For example, there might be a place in a field where a tractor accidentally dumped an excess amount of lime. In such cases, the field should be subdivided and composite samples collected and tested for each section. Alternatively, known problem areas can be avoided entirely.
Soils should be tested for nutrient levels and organic matter content every two or three years, unless a specific soil management process needs to be evaluated sooner. Organic matter testing is not included in routine UMass Soil Lab tests, so be sure to check the box on the sample submission form if you want organic matter results. A routine soil test at the UMass Soil Lab costs $20; organic matter is an additional $6.
Submitting Soil Samples
It’s important to request the appropriate test for the type of material you are submitting: field soil vs. soilless greenhouse media vs. high tunnel soil. Different materials are tested with different procedures that mimic how nutrients will become available to plants in the relevant field or greenhouse setting. If you have any questions about what type of test to request, you can contact the UMass Soil Lab at soiltest@umass.edu or the UMass Vegetable Program at umassveg@umass.edu or (413) 577-3976.
Ordering information and forms for the UMass Soil Lab are available here. For Routine Soil Tests for field soil, commercial growers should use the Commercial Vegetables and Fruits order form. Nutrient recommendations for commercial tests will be given in pounds per acre. Home gardeners should use the Home Grounds and Gardening order form, which will provide recommendations in pounds per 100 square feet. If you want to receive crop-specific nutrient recommendations with your test results, be sure to indicate the crops that will be grown on the submission form.
The UMass Soil Lab is currently offering routine soil tests, pre-sidedress soil nitrate tests (PSNTs), soil texture analysis, and soilless greenhouse media tests. Manure or compost analysis and plant tissue analysis is available through the University of Maine Soil Lab.
Types of Fall Soil Tests
The most common tests to request in the fall are routine soil tests and nitrate tests.
A routine soil test includes phosphorous, potassium, calcium, magnesium, and sulfur, as well as micronutrients. At UMass, the routine test automatically includes pH, but does not include nitrate or organic matter; these additional parameters can be requested as add-ons to the routine test. If the crop is indicated on the submission form, routine soil test results will inform how much of what type of fertilizer or soil amendment you should add to a field for that crop the following season, based on that crop’s nutrient needs and the soil test results. Haven’t prepared your crop rotation plans yet? No worries. You may ask for recommendations for up to 3 different crops without extra charge. The Home Grounds and Gardening form gives you the option to request general vegetable nutrient recommendations instead of crop by crop—this can also be useful for small-scale commercial growers if you don’t have the capacity to tailor your fertilization to each crop.
Nitrate levels are evaluated separately from the routine soil test. These tests are called pre-sidedress soil nitrate tests or PSNTs, although they can be used for reasons other than informing the need for sidedressing. A mid-season nitrate test, will tell you if sidedressing with nitrogen (N) is necessary. A fall nitrate test will tell you if you have excess N in the soil at the end of the season. This will inform whether to increase or decrease N fertilizer applications next season and whether you should plant a fall cover crop to scavenge and store the excess N for next spring. Soil nitrate content above 20 ppm in the fall indicates that too much N fertilizer was applied that season and an N-scavenging fall cover crop should be planted. Nitrate is very ephemeral in soils and is easily lost to leaching and to the air, so nitrate left in the soil at the end of the season will not be there next spring. If you have high soil nitrate content in the fall, planting a fall cover crop will scavenge this N. When the cover crop is tilled in the following spring, the N will then be available for your next cash crop. At the UMass Soil Lab, use the Pre-Sidedress Soil Nitrate Test form to submit a nitrate test soil sample, or check the box for nitrate on the routine soil test submission form; it is only an additional $8.
Interpreting Results and Choosing Amendments
Fall soil test results are primarily used to calculate fertilizer and other amendment needs for the following spring. We can provide fertilizer calculation support for commercial growers—contact us at umassveg@umass.edu or (413) 577-3976. Or, see our Calculating Fertilizer Applications article for step-by-step instructions. The UMass Soil Lab also provides a fact sheet on Interpreting Your Soil Test Results, with an explanation of all the information that appears on your results. In addition to fertilizers, there are several other common soil amendments that can be considered, based on fall soil test results. Below are explanations of some amendments:
Lime
Most New England soils are naturally acidic (pH of 4.5 to 5.5) and need to be limed periodically to keep the pH in the range of 6.0 to 7.0, which is ideal for most vegetable crops and beneficial microbes. Heavier soils or soils with high organic matter will buffer pH change better than sandy soils, and soil lab lime recommendations will take this into account. Lime can be applied any time, but it will change pH slowly, so fall applications are sometimes preferred to allow several months to raise the pH. Split applications (half in the fall and half in the spring) may also be effective. Powdered lime and pelleted lime (which is lime that is powdered then re-formed into pellets for ease of application) will react and raise the pH faster than regular lime, but are also much more expensive. Use dolomitic lime if your soil has low magnesium and calcitic lime if not. See Soil Acidity, pH, and Liming in the New England Vegetable Management Guide for more information on liming.
Compost
Compost is often applied in order to increase soil organic matter but also contain soluble nutrients that are available for crop use. Composts usually primarily add phosphorous to soils. Composts do also usually contain N, but only about 10% of the total N content in compost is available to the crop each year. If not applied to actively growing crops, phosphorous from composts can be lost to the environment.
Nutrient levels in composts can vary widely—e.g. phosphorous levels can vary from 0.1-3%—so analysis is important for determining rates of application. A compost analysis should be completed to measure nutrient availability and to determine if the product is finished before applying to the field. Unfinished compost applied to the field may pose microbial food safety risks or cause crop ammonium toxicity as it continues to decompose. Ammonium content below 100mg/kg and a carbon:nitrogen ratio of 20:1 indicates a finished compost. Higher amounts of ammonium indicate active decomposition, or unfinished compost. The C:N ratio is reduced as microbes break down carbon content in the pile and convert it to CO2. Compost analysis is available through the UMaine Soil Lab.
Matured compost applications are usually made in the spring; however, testing may happen in the fall in order to estimate plant available nutrients for next year’s crop and help determine future compost application rates.
Manure
Manure is an excellent source of nutrients, however, as manure ages and decays, considerable nutrient loss occurs from leaching, surface runoff, or volatilization of ammonia into the atmosphere. Manure may also contain pathogens such as E. coli and Salmonella. If raw manure is applied to vegetable fields, especially for crops that are likely to be consumed raw (e.g. carrots, but not potatoes), this food safety risk should be minimized by maximizing the interval between manure application and crop harvest. Certified organic producers must follow the National Organic Program Standards (NOP) 90/120 day rule that says that you need to wait 120 days after raw manure application to harvest vegetables where the harvesteable portion of the crop is likely to touch the soil (e.g. carrots, melons, lettuce), or 90 days for vegetables where the harvestable portion of the crop is not likely to touch the soil (e.g. tomatoes, peppers). For farms covered by the Food Safety Modernization Act, there is no specified application interval required but this NOP rule is a good rule-of-thumb to follow per the FDA. Ideally, manure should be applied in the fall or to a non-food rotation crop. Fall-applied manure should be incorporated immediately and a winter cover crop should be planted to protect N from leaching. Make manure applications in cold weather to reduce volatilization, but not to frozen ground, as this increases surface runoff potential. In no-till systems, research has shown that surface-applying manure to a growing cover crop will reduce nutrient losses compared to surface applications to bare ground. In order to make accurate nutrient applications to best fit your crop needs, a manure analysis should be conducted—manure analysis is available through the UMaine Soil Lab. Be sure to submit your samples in a tightly sealed container or the postal service will be very unhappy with you!
Cover Crops
Cover crops planted in the fall, (historically before September 15, although that date is moving later and later every year), are an excellent way to capture and store nutrients for your crops in the following spring. All cover crops will scavenge leftover N, but different cover crop types add or immobilize different amounts of plant-available nitrogen (PAN) to the soil when incorporated in the spring. See our Late Season Cover Crops article for details in addition to what is below.
- Legume cover crops provide up to 100 lb PAN/A when incorporated, because they fix N from the air. To maximize PAN contribution from legumes, kill the cover crop at bud stage in the spring.
- Cereal cover crops immobilize up to 50 lb PAN/A because the high carbon content leads to a spike in soil microbe activity, which ties up the N in the soil. To minimize PAN immobilization from cereals, kill the cover crop during the early stem elongation (jointing) growth stage.
- Legume/cereal cover crop mixtures vary widely in how much PAN they add to the soil, depending on legume content. When the dry matter from a cover crop mix is 75% from cereals + 25% from legumes, PAN contributions is usually near zero when incorporated. Higher legume content means higher PAN contribution and higher cereal content means more N immobilization.
Micronutrients
Routine soil tests are calibrated for macronutrient content levels. Because micronutrient levels in soil are comparatively very low, these levels are not accurately measured by routine soil tests. Plants require very low levels of most micronutrients and it is generally uncommon to have micronutrient deficiencies in New England soils. Additionally, the “recommended” ranges listed for micronutrients are not optimal ranges, as they are for macronutrients, but instead are the typical ranges found among samples submitted to the lab. The best way to diagnose and address micronutrient deficiencies in vegetable crops is to scout for nutrient deficiency symptoms and submit tissue samples during the growing season. For recommendations on specific micronutrients needed for crop growth, such as boron, see the Micronutrient section of the New England Vegetable Management Guide.
Most nutrient applications should be made in spring, when a growing crop is best able to use the applied nutrients and avoid leaching, runoff, or volatilization.
Need further assistance interpreting your soil test results? Contact the UMass Soil Lab at soiltest@umass.edu or our new Soil Health Extension Educator, Arthur Siller, at asiller@umass.edu or (413) 545-9747.
--UMass Vegetable Program
Photographing Insects for Identification
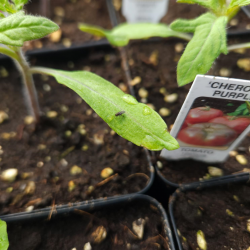
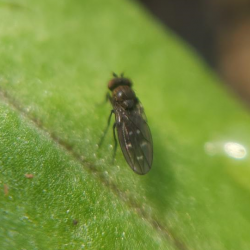
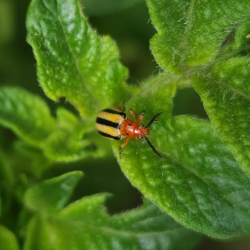
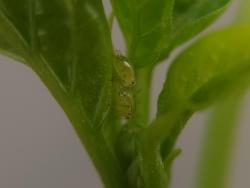
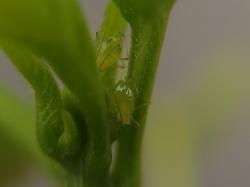
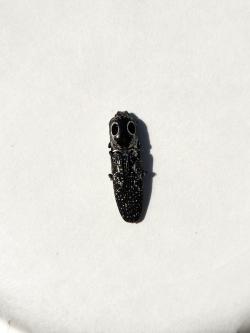
Identification of pests and natural enemies is a crucial part of integrated pest management, but the vast number of insects and other invertebrates can make it difficult to see the differences between one species and another. One option is to get the input of an expert, but insect samples are difficult to ship and fail to entirely convey some important information such as pest location, numbers, and crop damage. You could try to describe what you’re seeing on your crops, but a picture is worth a thousand words. Photos are a convenient and inexpensive way to convey a scene to experts, but photography of such small subjects can be difficult without specialized equipment. Luckily, there are some simple skills you can learn which will allow you to take more detailed photos and receive more accurate identifications.
Focus the camera on the subject
An unfocused subject is one of the most common issues when it comes to smartphone photos of invertebrates. Smartphone cameras are not primarily geared towards taking photos of smaller subjects, but most are able to capture decent images if used correctly. Center and tap on your subject on your phone screen, adjusting the distance of your phone to the subject until the image looks sharp, not blurry.
If you want to get more advanced, many phone cameras will also have a “pro” or “macro” mode which gives greater control of camera settings. Switch the phone’s focus to manual and lower it until only the closest subjects are in focus, then adjust your distance from the subject until you’ve found the ideal distance for a sharp photo. This may not be necessary for large subjects but will ensure that you are using your phone’s camera to its fullest capacity for small subjects.
Get close to your subject
Changing the focus on your camera will allow you to get in very close and still take a sharp, detailed photo of your subject. A limitation of phone cameras is that you will need to get closer than you think, especially for smaller subjects—sometimes just a few inches away. This can be difficult to do with quick, flighty insects, but avoiding sudden movements and slowly inching closer while capturing a series of photos will help you get more close-up photos before an insect escapes. Insects also tend to be less active early in the morning while the air is cooler, making them easier to photograph.
Zooming in while taking a photo with a phone camera is generally the same as cropping the edges of a photo after the photo has been taken. While it can be helpful to cut irrelevant information out of the image, zooming in past 2-3x does not capture any additional detail and may make it more difficult to capture the photo. Instead of zooming in, focus on getting as close as you can while making sure the image is still in focus.
Another option is to purchase a macro lens attachment for phone cameras. These are available from various online retailers. The attachments clip on to the lens on your phone and allow you to take photos of smaller subjects, though you will need to get even closer to your subject.
Keep a steady hand
When photographing smaller subjects, every motion your camera makes is magnified in the resulting image. Keeping your hand still enough to avoid motion blur in your photos can be difficult but becomes easier with practice. Brace your arm with something steady such as a branch, the ground, your knee, or even your other hand. Take multiple photos and choose the clearest one. If the subject is on a part of a plant that is moving in the wind, hold on to the plant with your other hand as you take the photo.
Photograph multiple angles
Many insects can only be identified visually through specific and often unintuitive features which may be on any part of their body. Rather than needing to learn all these characteristics, it can be helpful to photograph a subject from many different angles to ensure you capture the important features that will allow an expert to make an identification.
Consider colors and lighting
Phone cameras will default to capturing as much detail as possible in all parts of the image, but this can be detrimental when details of the subject are sacrificed to capture details in the background. This often occurs in scenes with high contrast between the subject and background, resulting in a silhouette with little to no detail. To correct this, you can either manually adjust the exposure (how dark or bright the scene looks) until details can be seen on the subject, or you can manipulate the scene so that there is less contrast between the subject and background.
Phone cameras also tend to perform very well in bright, well-lit environments, but struggle in low light. If you have the option, photos are best taken during a well-lit day, preferably in the shade to avoid the high contrast that comes with direct sunlight.
Capture the full scope of the scene
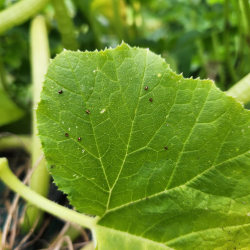
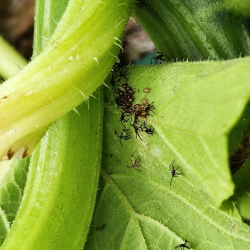
In addition to the insect itself, other information such as host plants and damage, insect density and behavior, and the appearance of different life stages can be helpful information for identification. Including this information in your photos can help ensure that you receive an accurate identification.
The size of the subject is also often useful information for identification, but it can be difficult to gauge in some photos. Consider including a reference of known size such as a coin or ruler to provide visual context.
Once you’ve captured some clear photographs of your subject, you can use them as references to compare with photos in guides and online resources or send them to an expert for identification. Several smartphone apps also exist which can provide you with some identification guesses based on your photos, though these are not always accurate and should be taken with caution. In any case, clear and detailed photos will allow you to better understand and communicate what you are seeing, which can lead to more informed IPM decisions.
The UMass Extension Vegetable Program is always happy to try and identify insect pests of vegetables through photos—email pictures to umassveg@umass.edu.
--Written by Ali Shokoohi, UMass Vegetable Program
Report from Quebec: Greenhouse Growing Across the Border
--Written by Becky Maden, Univiersty of Vermont Extension Vegetable Nutrient Management Specialist
Greenhouse growing in Quebec has always held a mythical allure for me: how do they produce such consistently beautiful produce year-round at an even higher latitude than Vermont? This past month, Cheryl Sullivan and I had the chance to tour some greenhouses with a group of Extension professionals and farmers from Vermont, New Hampshire, and Maine. Jacques Thériault, an agronomist from Climax Conseils in Quebec, graciously spent two days touring us to some of the farms he works with. We wanted to see systems and techniques used in operations of a similar scale to those in the Northeast U.S. and bring information back to share with growers. Below are a few key takeaways from our trip which can provide fodder for your daydreams when tunnel work feels especially laborious this season.
-
Automation systems are powerful.
Environmental controls were one of the main commonalities among the farms we visited. Most farms we visited were small, with less than a half-acre under cover, but there was significant investment in the physical structures and systems used to manage them. The first greenhouse we visited was a three-bay gutter tied greenhouse, with roughly 20,000 square feet of hydroponic tomatoes, cucumbers, pole beans, peppers, and lettuce. Nearly everything was controlled by a $45,000 automation system including water, fertility, ventilation, CO2, and temperature.
The justification for automation is powerful on two levels: First, the quality of the crops is unparalleled since the environment is optimized for plant growth. Our group marveled at the perfectly spaced trusses of tomatoes, straight glossy cucumbers, and pepper plants (wow!) that were fifteen feet high with leaves bigger than my head! Second, automation allows growers the freedom of spending time off the farm and still monitoring conditions with controls managed remotely from phones. This can also free up considerable mental space, allowing the grower to focus on other important aspects of the business. While we were warned repeatedly about the importance of multiple back-up systems, none of the growers we met were nostalgic for the good ol’ days of manual controls.
-
Rails, wheels, and platforms improve efficiency.
In most of the greenhouses we visited, rails (think mini train tracks) between beds accommodated harvest carts and platform lifts for easy crop access and efficient harvest. Some operations run warm water through the rails to serve the dual purpose of providing heat while also enabling efficient crop care. One farmer emphasized that having a well-functioning electric lift could turn a multiple-hour job of pruning and lowering plants into a 10-minute job. With these types of labor savings, a $15,000 piece of equipment seems like an excellent investment. Likewise, harvest carts that travel down the rails make harvest and transport very quick and ergonomic.
-
Plant management can “steer” productivity.
There is a big emphasis on combining environmental controls with pruning techniques for optimal productivity. This means balancing vegetative with reproductive needs of the plant to maintain consistent fruit over the course of a long greenhouse growing season. In particular, CO2 management was something all the growers talked about. Since plants require CO2 for photosynthesis, additional CO2 can help boost plant growth, especially during times of year when there is abundant sunlight, making CO2 a limiting factor in photosynthesis. Although the growers we met use a CO2 burner, there was some discussion of using compost piles, which are actively respiring CO2 as a more ecological way to enhance the growing environment.
-
Beneficials are relied upon for pest management.
 Biocontrols were used in every greenhouse! Most greenhouses had a good balance of natural enemies to pests and the plants looked beautiful. The high adoption of banker plant systems was a real standout. Notably, the “aphid banker plant system” that supports the parasitic wasp Aphidius colemani for green peach and melon aphid suppression, and mullein to support the predatory bug Dicyphus hesperus. Dicyphus is used mostly for whitefly management, but it also attacks spider mites, thrips, and other small pests. The drawback to using the mullein system is that it takes 4 to 5 months for it to establish prior to starting the spring crop.
We took in a lot of information during a short time in Quebec which left me wondering: what would our industry here would look like if we felt less constrained by both the economic and environmental costs of high-tech greenhouse systems? In the short-term, it is exciting to consider ways to immediately apply information we learned in Quebec such as pruning practices and crop steering techniques. In the longer term, it may be worth considering if there is an opportunity for growers to expand tunnel crop diversity, build structures to grow year-round, and adopt higher-tech systems? As the climate crisis becomes more acute, expanding our vision of local agriculture is critical, and greenhouses may play a key role in helping us grow into the future.
News
New UMass Extension Newsletter: The Pollinator Buzz!
Interested in learning about pollinator health, outreach events, and conservation opportunities? Subscribe to receive the latest updates via The Pollinator Buzz, a new quarterly newsletter from UMass Extension. Typical features will include native plant and bee species profiles, hot topics in bee conservation, upcoming event announcements, and more!
See http://ag.umass.edu/resources/pollinators/native-pollinators-conservation/pollinator-buzz for more info, and to subscribe!
Events
Urban Agriculture Mentor Farms Fall Twilight Meeting Series
Come ring in fall at the concluding events of the 2024 Urban Ag Mentor Farm Program. The UMass Extension Urban Ag Team and the Urban Ag Mentor Farms will discuss what they learned from their pest management and technical assistance work together this season. These events will also feature conversations with UMass Extension Vegetable Team specialists and each of the events will close out with a light dinner.
Regional Environmental Council
When: Thursday, October 3, 4:30-6:30pm
Where: 42 Lagrange St. (rear), Worcester, MA 01610
Registration: Coming soon!
Urban Farming Institute
When: Thursday, October 10, 3-5pm
Where: 487 Norfolk St, Mattapan, MA 02126
Registration: Please register in advance so we know how much food to order. Click here to register.
These events are supported by the National Institute of Food and Agriculture, U.S. Department of Agriculture, through the Northeast Sustainable Agriculture Research and Education program.
Dahlia Farm Walk at Grant Family Farm
When: Tuesday, September 24, 4-6pm
Where: Grant Family Farm, 866 Main St, West Newbury, MA
Registration: Free, but please register in advance here.
Join us in West Newbury on September 24 for a farm walk all about dahlias. We’ll tour Grant Family Farm and hear from farmers Alice and Chris. The UMass Extension vegetable program will also host a listening session to learn about your challenges and needs related to growing cut flowers.
Twilight Meeting: Climate Impacts on Weed Management and Soil Health - South Deerfield, MA
When: Tuesday, October 8, 2024, 4-6pm, with a light supper to follow
Where: UMass Crop & Livestock Research & Education Farm, 89 River Rd., South Deerfield, MA, 01373
Registration: Free! Please register in advance so we can order enough food. Click here to register.
How are climate change and hotter temperatures affecting our soils? Often, practices like reducing tillage and cover cropping are recommended to improve soil health, reduce risk of topsoil loss and enhance resilience to drought and flood—practices that can also affect weed management. UMass Extension will discuss general impacts of climate change on soil health and highlight current research on updating recommendations for planting timing and overwintering survival of cover crop species in MA. Maria Gannett, UMass Extension Weeds Specialist, will relate these strategies to how they can impact weed management.
1 pesticide recertification credit is available for this program.
This event is co-sponsored by CISA as part of their Adapting your Farm to Climate Change Series.
Food Safety & Storage in a Warmer New England
When: Tuesday, October 15, 4-5:30 pm
Where: Kitchen Garden Farm, 131 S. Silver Lane, Sunderland, MA, 01375
Registration: Free, registration info coming soon!
Join UMass Extension, CISA, and UVM Extension for a climate-themed twilight meeting at Kitchen Garden Farm in Sunderland, MA!
- Lilly Israel and Max Traunstein, Owners, Kitchen Garden Farm - Tour of the farm's postharvest and food production facilities, and discussion on how the farm is considering climate change and food safety in its operations.
- Chris Callahan, Extension Associate Professor, UVM Extension Ag Engineering - Precooling resources, sizing CoolBots and coolers, condensation management, and guidance on sorting/culling product for storage
- Lisa McKeag, Extension Educator, UMass Extension - Overview of potential climate impacts on food safety
This event is co-sponsored by CISA as part of their Adapting your Farm to Climate Change series.
Gaining Ground Farm Tour
When: Thursday, October 17, 2024, 4-6pm
Where: Gaining Ground, 341 Virginia Rd., Concord, MA 01742
Join New Entry and UMass Extension for a tour of Gaining Ground Farm, focusing on the benefits and techniques of growing under cover. This workshop is designed to help farmers reduce production risks and increase the efficiency of their farming operations through the use of covered growing structures.
Presentations:
- Farm Tour: Explore Gaining Ground Farm’s innovative use of various covered growing structures, including five high tunnels (one of which is a rolling tunnel), ten caterpillar tunnels, two heated greenhouses, and row cover tunnels. See firsthand how these structures support year-round farming and enhance crop quality.
- Risk Management Strategies: Kari Bender, Gaining Ground Farm Co-manager, will share her extensive experience with different plastic structures, including high tunnels, low tunnels, and caterpillar tunnels. Learn how these structures can mitigate production, financial, and marketing risks.
- Pest and Weed Management: Susan Scheufele, Production Agriculture Team Leader at UMass Extension, will provide training on identifying and managing pests and weeds on your farm. Learn about effective pest exclusion netting and receive handouts on managing common winter pests.
This material is based upon work supported by USDA/NIFA under Award Number 2023-70027-40447.
New England Vegetable & Fruit Conference - Register now for early bird pricing!
When: Tuesday - Thursday, December 17-19, 2024, 8am-6pm daily
Where: Doubletree Hotel, 700 Elm St., Manchester, NH 03101
Registration: Before November 30, $115/person, or $85 for additional attendees if registering as a group. Students $50. Registration capped at 1,400. Click here to register.(link is external)
The NEVF Conference includes more than 25 educational sessions over three days, covering major vegetable, berry and tree fruit crops as well as various special topics. A Farmer-to-Farmer meeting after each morning and afternoon session will bring speakers and farmers together for informal, in-depth discussions on certain issues. The extensive trade show has over 120 exhibitors.
Vegetable Notes. Maria Gannett, Genevieve Higgins, Lisa McKeag, Susan Scheufele, Alireza Shokoohi, Hannah Whitehead, co-editors. All photos in this publication are credited to the UMass Extension Vegetable Program unless otherwise noted.
Where trade names or commercial products are used, no company or product endorsement is implied or intended. Always read the label before using any pesticide. The label is the legal document for product use. Disregard any information in this newsletter if it is in conflict with the label.
The University of Massachusetts Extension is an equal opportunity provider and employer, United States Department of Agriculture cooperating. Contact your local Extension office for information on disability accommodations. Contact the State Center Directors Office if you have concerns related to discrimination, 413-545-4800.
